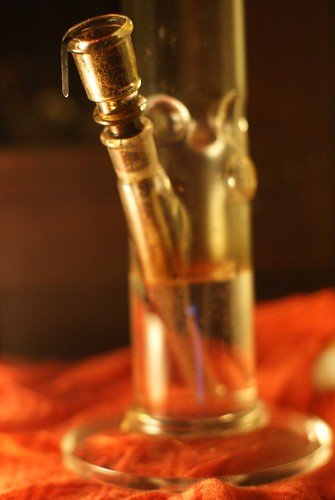
If you are looking for a quick and easy way to enjoy your herb or tobacco, you might want to try making a water bottle bong. A water bottle bong is a simple homemade device that allows you to smoke your product through water, which cools and filters the smoke. All you need are some basic household items and a few minutes of your time. Here is how to make a water bottle bong in 5 easy steps.
Step 1: Gather Your Materials
To make a water bottle bong, you will need the following materials:
- An empty plastic water bottle. Any size will work, but a standard 16.9 ounce bottle is ideal. Remove the cap and the label.
- A lighter. You will use this to light your herb or tobacco, but also to help make the hole for the downstem and melt it to the bottle.
- Scissors or another sharp tool. You will use this to poke holes in the bottle for the downstem hole and the carb.
- A bowl. You can use any small metal object that can hold your product, such as a socket, a thimble, or a bottle cap. Alternatively, you can make your own bowl using aluminum foil.
- A downstem. This is the tube that connects the bowl to the water in the bottle. You can use any hollow plastic tube that fits snugly in the hole you will make, such as a pen tube, a straw, or a marker.
- Some duct tape or gauze. You will use this to seal any gaps between the downstem and the bottle.
- Some water. You will use this to fill the bottle about a quarter of the way.
Step 2: Make the Downstem Hole
The downstem hole is where you will insert the tube that connects the bowl to the water. To make this hole, follow these steps:
- Find a spot on the side of the bottle that is slightly above the waterline when you fill it up a quarter of the way.
- Use your scissors or sharp tool to poke a small hole in that spot. Be careful not to cut yourself or make the hole too big.
- Use your lighter to heat up the tip of your downstem tube. This will make it easier to push through the hole and melt it to the bottle.
- Push the heated end of the tube through the hole at an angle so that it reaches into the water. The other end of the tube should stick out of the bottle and point upwards.
- Use some duct tape or gauze to seal any gaps between the tube and the bottle. This will prevent any air leaks and ensure a smooth draw.
Step 3: Make the Carb
The carb is the hole that you will cover with your finger when you inhale and release when you clear the smoke from the bottle. To make this hole, follow these steps:
- Find a spot on the opposite side of the bottle from where you made the downstem hole. It should be slightly above or below it, depending on your preference.
- Use your scissors or sharp tool to poke another small hole in that spot. Again, be careful not to cut yourself or make the hole too big.
- You can leave this hole as it is, or you can use your lighter to slightly melt it and smooth out any rough edges.
Step 4: Attach or Make the Bowl
The bowl is where you will place your herb or tobacco before lighting it. To attach or make your bowl, follow these steps:
- If you have a ready-made bowl, such as a socket, a thimble, or a bottle cap, simply insert it into the open end of your downstem tube. Make sure it fits snugly and securely.
- If you don’t have a ready-made bowl, you can make one using aluminum foil. To do this, tear off a small piece of foil and wrap it around the open end of your downstem tube. Press it down into the center of the tube to form a depression that can hold your product. Poke some small holes in the foil with your scissors or sharp tool so that smoke can pass through.
Step 5: Use Your Water Bottle Bong
Now that you have made your water bottle bong, you are ready to use it. To do this, follow these steps:
- Fill the bottle with water until it covers the end of the downstem tube inside the bottle.
- Pack your bowl with your herb or tobacco. Don’t pack it too tightly or too loosely, as this can affect the airflow and the burning.
- Cover the carb hole with your finger and place your mouth over the opening of the bottle.
- Use your lighter to ignite your product and inhale slowly and steadily. You should see smoke filling up the bottle.
- When you are ready to clear the smoke, remove your finger from the carb hole and inhale sharply. You should feel the smoke rushing into your lungs.
- Exhale and enjoy the effects of your product.
Congratulations, you have just made and used a water bottle bong! Remember to clean your bong after each use and dispose of it properly when you are done with it. Happy smoking!


