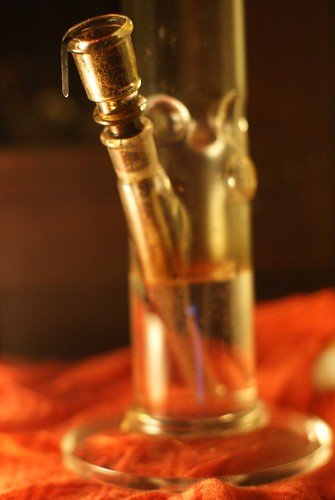
A bong is a device that filters smoke through water to create a smoother, cooler, and less harsh hit. Bongs can be made from various materials, such as glass, metal, ceramic, or plastic. However, sometimes you may not have access to a bong or you may want to try something different and creative. In that case, you can make your own bong at home using some cheap and basic supplies. Here are some steps on how to make a homemade bong using a plastic bottle and a highlighter.
What You’ll Need
- A plastic bottle of any size, but preferably not too large or too small.
- A highlighter with the ink and tip removed.
- A small piece of aluminum foil.
- A sharp tool, such as a pen, a knife, or a paperclip.
- Some herb or tobacco to smoke.
- A lighter or matches.
Step 1: Fill the Bottle with Water
Fill up the plastic bottle about a quarter of the way with water. This water will act as the filter for the smoke and cool it down. You don’t need too much water, just enough to submerge the end of the highlighter tube that will go inside the bottle. Don’t worry if you don’t have the cap for the bottle, you won’t need it.
Step 2: Make the Carb
The carb is the hole that you will cover with your finger when you inhale and release when you want to clear the smoke from the bottle. To make the carb, poke a hole near the neck of the bottle with your sharp tool. Make sure the hole is large enough for air to flow through it easily, but not so big that you can’t cover it with your finger. Be careful not to cut yourself or make the hole too big.
Step 3: Make the Downstem
The downstem is the tube that connects the bowl where you put your herb or tobacco to the water in the bottle. To make the downstem, use the highlighter with the ink and tip removed. You should have a hollow plastic tube with a wide end and a narrow end. Then, tear off a small piece of aluminum foil and wrap it around the wide end of the tube. Press the center of the foil down into the tube to make a bowl shape and poke some tiny holes in it so the smoke can get through. This will be where you put your herb or tobacco.
Step 4: Insert the Downstem into the Bottle
Now you need to make another hole in the bottle for the downstem to go through. This hole should be slightly above the waterline and on the opposite side of the carb. Use your sharp tool to make this hole about the same width as a pen. If it’s too small, you may have trouble pushing the downstem through. If it’s too large, the downstem may be too loose and let air escape. Once you have made this hole, push the narrow end of the downstem through it at an angle so that the open end inside the bottle is submerged in the water. The bowl should be facing upward on the outside of the bottle.
Step 5: Pack the Bowl and Enjoy Your Homemade Bong
You’re almost done! All you need to do now is pack some herb or tobacco into your aluminum foil bowl and light it up. To use your homemade bong, start by covering the carb with your finger and placing your mouth over the opening of the bottle. Then, light your herb or tobacco and inhale slowly until you see smoke filling up the bottle. When you’re ready to take a hit, remove your finger from the carb and inhale quickly to clear all the smoke from
the bottle.
Congratulations! You have just made your own homemade bong using a plastic bottle and a highlighter. You can reuse this bong as many times as you want, but make sure to change
the water and clean it regularly to avoid mold and bacteria growth. You can also experiment with different sizes and shapes of bottles, as well as different materials for
the downstem and bowl. Have fun and enjoy your homemade bong!


